


Are you looking to master the art of Danish braid hair? Look no further! In this guide, I will walk you through the process of creating a stunning Danish braid hairstyle. Follow these step-by-step instructions to achieve a chic and sophisticated look.
Key Takeaways:
- Start by brushing your hair and removing any tangles.
- Use a smoothing spray or cream to control flyaways.
- Separate the front section of your hair and divide it into three equal parts.
- Cross the front section under the middle section, then cross the back section under the middle section.
- Add small sections of hair to each section as you continue braiding, crossing the sections under each other.
- Keep adding hair and braiding until you reach the base of your neck.
- Secure the braid with a hairband and repeat the process on the other side of your head.
- For a wavy look, create double Dutch braids before bed and remove them in the morning.
Step-by-Step Guide to Danish Braid Hair
To get started with your Danish braid hairstyle, it’s important to follow these step-by-step instructions for a flawless result.
Gather Your Tools and Prepare Your Hair
Before you begin braiding, make sure you have all the necessary tools and products. You will need a comb or brush, hair elastics or bands, and a smoothing spray or cream to control flyaways. Start by brushing your hair and removing any tangles. Then, spray the top of your head with the smoothing spray or cream to create a sleek base for your braids.
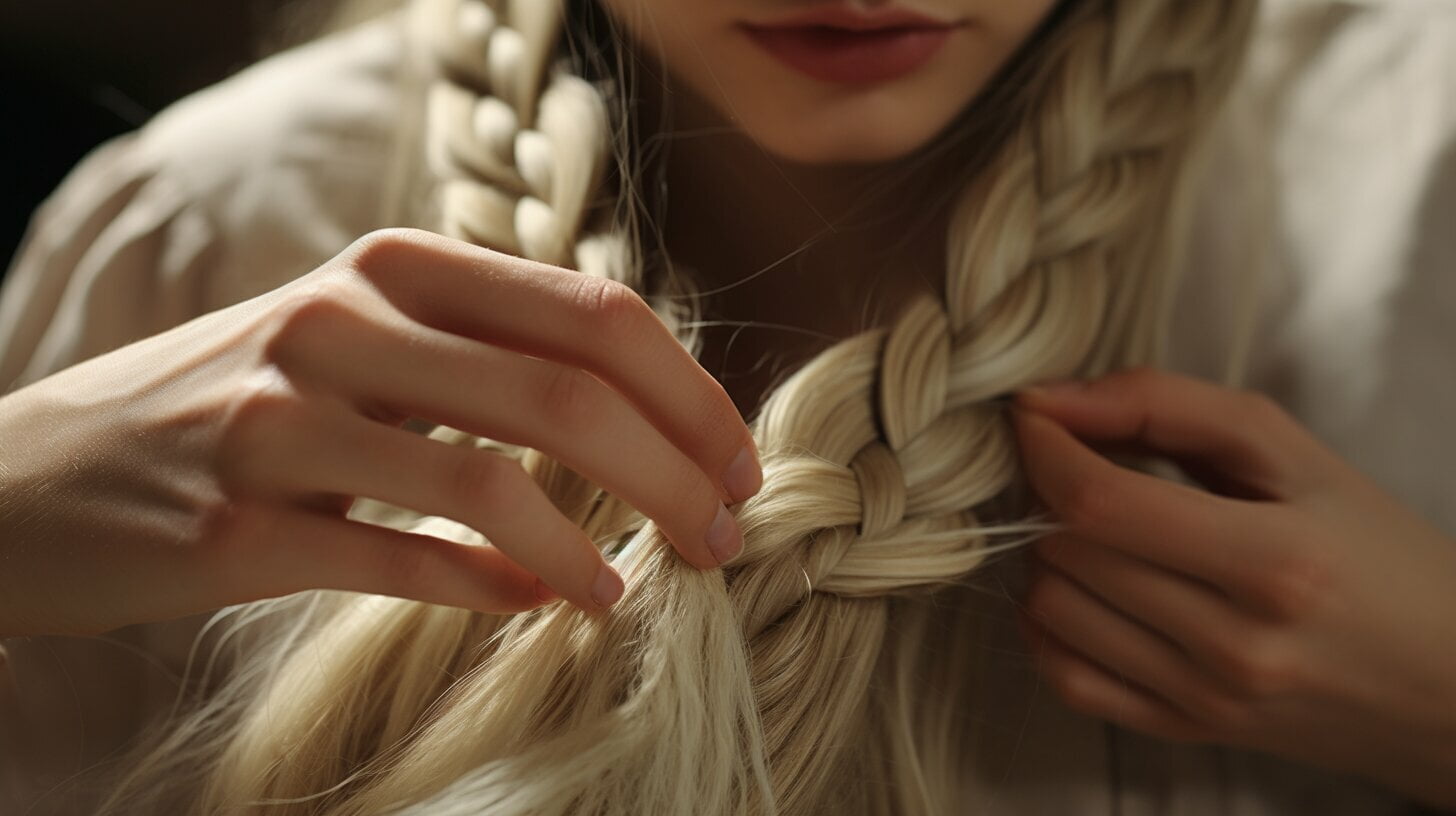
Divide and Cross the Sections of Hair
Next, separate the front section of your hair and divide it into three equal parts. Hold the left section in your left hand, the middle section between your index and middle finger, and the right section in your right hand. Cross the front section under the middle section, forming an X shape. Then, cross the back section under the middle section, creating another X shape. This is the basic starting point for your Danish braid.
Add Hair and Braid Down
To create a Danish braid, you will be adding small sections of hair to each main section as you continue braiding. Take a small section of hair from the front, next to the section you just crossed under, and add it to the front section. Cross the front section under the middle section again, incorporating the added hair. Repeat this step with the back section, adding a small section of hair from the back and crossing it under the middle section. Continue adding hair and braiding until you reach the base of your neck.
Once you’ve reached the desired length, secure the braid with a hairband. Repeat the same steps on the other side of your head to create a symmetrical look. If you prefer a wavy hairstyle, consider creating double Dutch braids before bed and removing them in the morning for natural-looking waves.
Follow these step-by-step instructions to master the art of Danish braid hair. With a little practice, you’ll be able to create a chic and sophisticated hairstyle that is sure to turn heads.
Additional Tips and Tricks for Danish Braid Hair
Take your Danish braid hairstyle to the next level with these additional tips and tricks that will make your braids look professional and polished.
1. Prep your hair: Before starting the Danish braid, it’s essential to prepare your hair properly. Apply a styling mousse or volumizing spray to add texture and hold to your hair. This will help your braids stay in place and prevent them from unraveling throughout the day.
2. Secure with bobby pins: If you find that your Danish braid is slipping or becoming loose, use bobby pins to secure it in place. Simply slide a few pins discreetly along the braid to ensure it stays intact and looks flawless.
3. Add accessories: Enhance the beauty of your Danish braid by adding some accessories. Try weaving a skinny ribbon or a delicate chain into your braid for a touch of elegance. You can also use decorative hairpins or flowers to add a romantic and whimsical feel to your hairstyle.
4. Set with hairspray: To ensure that your Danish braid stays put all day long, give it a light mist of hairspray. This will help to lock in the style and keep your braids looking fresh and polished.
By following these additional tips and tricks, you can elevate your Danish braid hairstyle and achieve a stunning look that will turn heads wherever you go. Experiment with different variations and accessories to make your braids uniquely yours.
FAQ
How to Do Danish Braid Hair?
To do a Danish braid hair, start by brushing your hair and removing any tangles. Spray the top of your head with a smoothing spray or cream to control flyaways. Separate the front section of your hair and then divide it into three equal parts. Cross the front section under the middle section, and then cross the back section under the middle section. Add small sections of hair to each section as you continue braiding, making sure to cross the sections under each other. Keep adding hair and braiding until you reach the base of your neck. Secure the braid with a hairband and repeat the process on the other side of your head. For a wavy look, you can create double Dutch braids before bed and remove them in the morning.
Step-by-Step Guide to Danish Braid Hair
In this section, you will learn the step-by-step guide on how to create a beautiful Danish braid hairstyle. Follow these instructions carefully to achieve a chic and sophisticated look.
Additional Tips and Tricks for Danish Braid Hair
In this section, you will find additional tips and tricks to enhance your Danish braid hairstyle. These helpful suggestions will ensure that your braids stay intact and look fabulous throughout the day.


